Adds a demonstration doc showing every harness test mapped to the UI state
you should see on a correctly-configured CKBunker + Coldcard HSM. Each
screenshot is paired with the specific test that asserts the outcome,
plus guidance on what failure at that step means. Sensitive/site-specific
identifiers (IPs, domain, device serial, CF tunnel UUID) are generalised
so the doc reads as a template for any deployment.

15 screenshots in docs/images/ cover: physical rack installation, policy
config UI, message signing end-to-end, sub-threshold auto-sign via web
UI and CLI, the critical policy-rejection case, TOTP-authorised signing,
and dashboard counter verification.
14 KiB
Demo — validating a real production CKBunker deployment
This walkthrough shows the harness run against a live, rack-mounted CKBunker + Coldcard Mk4 in HSM mode. Every screenshot is from a real validation run on production hardware, paired with the exact test in this repo that asserts the outcome you see. Use it as reference for what "good" looks like when you run the harness against your own deployment.
Environment details (IPs, domain names, device serials) have been generalised; your values will differ.
The deployment being validated
        ┌──────────────────────────────────────┐
        │  Client (laptop / CI runner)         │
        │    python hsm_validate.py            │
        └──────┬───────────────────────────────┘
               │  Tailscale WireGuard overlay
               ▼
        ┌──────────────────────────────────────┐
        │  CKBunker VM                         │
        │    Ubuntu 24.04, Python 3.12         │
        │    ckbunker.service (systemd)        │
        │    hsm.<your-domain>  (CF Tunnel)    │
        │    http://<tailnet-ip>:9823          │
        └──────┬───────────────────────────────┘
               │  USB HID passthrough
               ▼
        ┌──────────────────────────────────────┐
        │  Coldcard Mk4 in HSM mode            │
        │    "<your org> HSM approval" policy  │
        │    Rule #1 / #2 / TOTP enforcement   │
        └──────────────────────────────────────┘
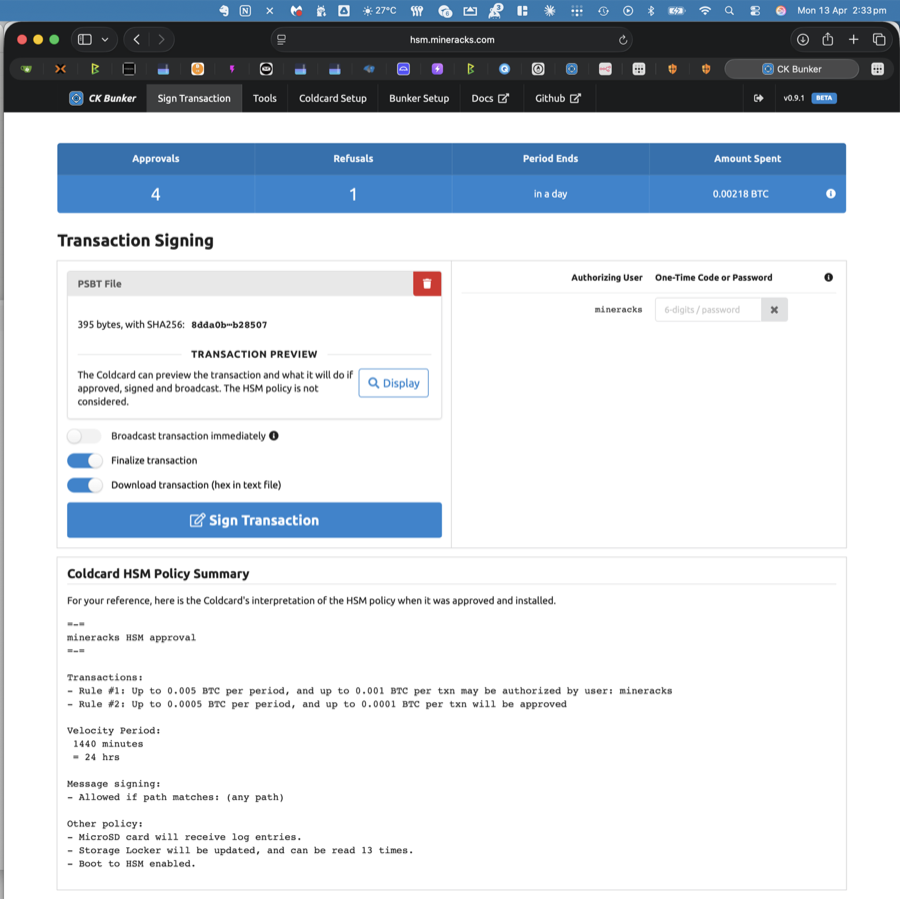
Policy installed on the Coldcard (abbreviated — yours may differ in thresholds):
Rule #1: ≤ 0.001 BTC/txn, ≤ 0.005 BTC/period  (needs TOTP from user "operator")
Rule #2: ≤ 0.0001 BTC/txn, ≤ 0.0005 BTC/period (auto-approved)
Velocity period: 1440 min (24 h)
Message signing: any path allowed
MicroSD logging: on
Boot to HSM: on (6-digit escape code)
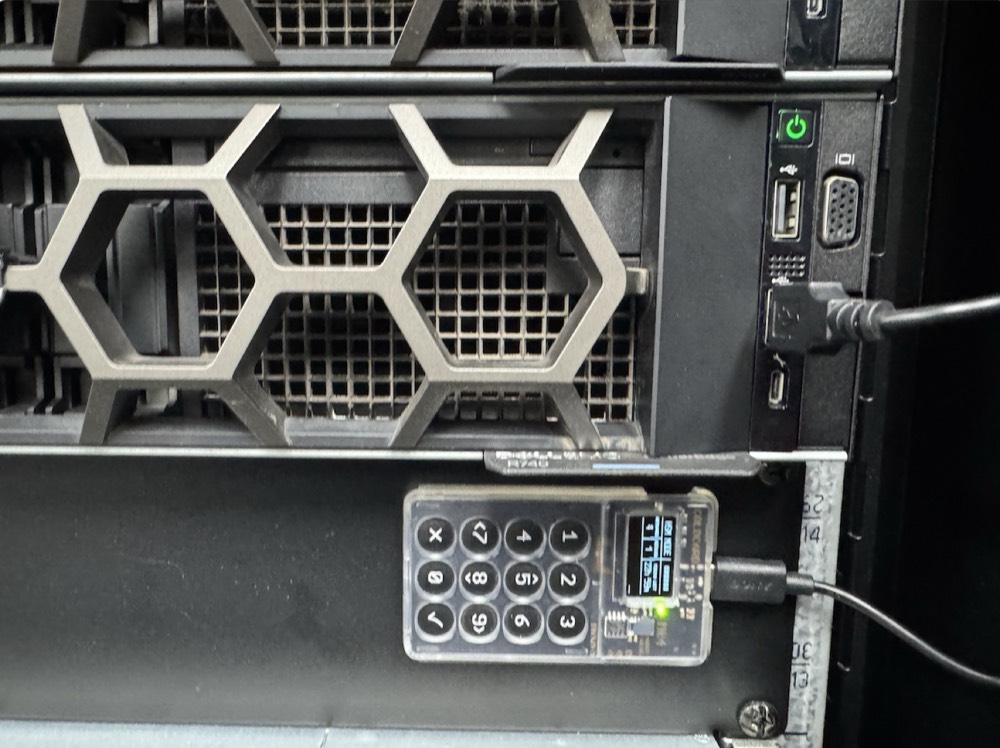
Physical setup
The Coldcard Mk4 is rack-mounted and USB-attached to the Proxmox host that runs the CKBunker VM. It stays in HSM mode continuously; the keypad is the only channel for policy changes.

d13e:cc10) so the device survives VM restarts.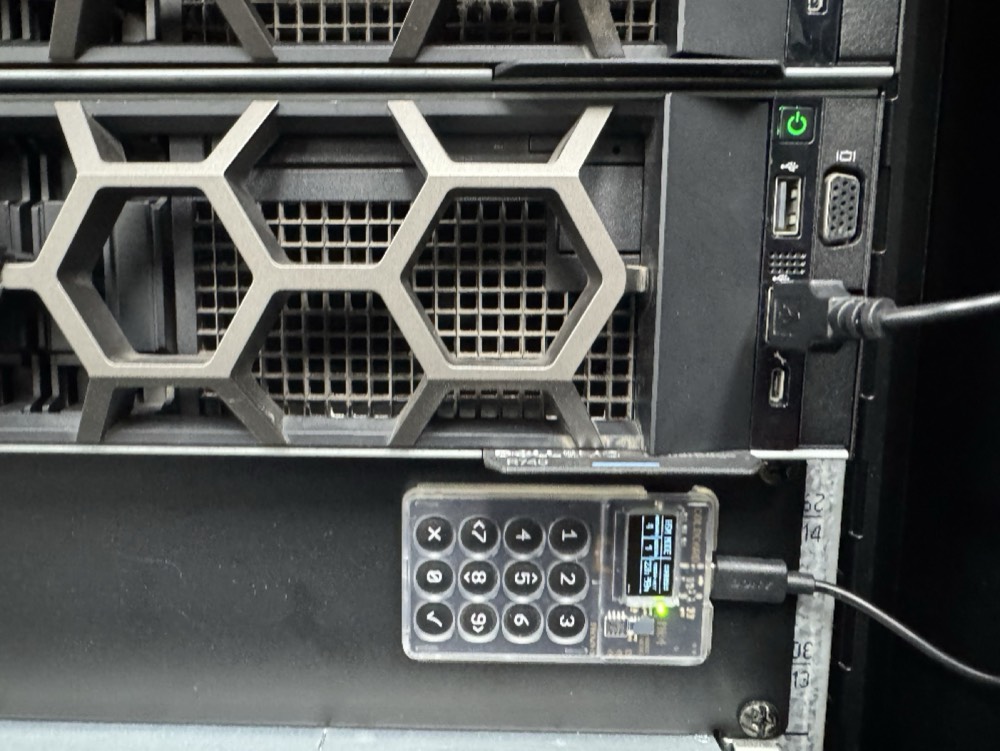
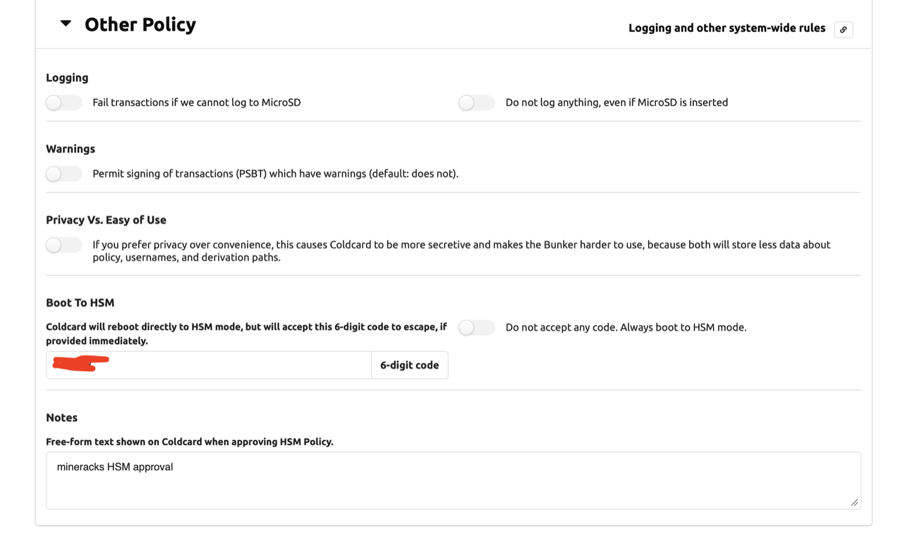
The policy — configured once, enforced forever
The Coldcard's policy is loaded on-device via keypad + MicroSD. The CKBunker web UI lets you author the policy file before it gets signed and shipped to the Coldcard, but it cannot modify an already-installed policy over the wire.
The harness reads your expected thresholds from config.yaml and asserts
every outcome against them. Your policy shape can differ from the example
— adjust policy.auto_approve.per_txn_sats etc. to match what you
actually installed.
Test 1 — connectivity
The cheapest check: HTTP reachable, WebSocket URL extractable from the page, session cookie obtained.
./hsm_validate.py --tests connectivity
No UI screenshot — this happens before any user-visible action. On success you'll see:
✓ connectivity    HTTP + WS endpoint reachable  (0.3s)
    WebSocket URL: ws://<bunker>:9823/websocket/CBG5KH5BCCG6W3BXDH5QQY5Q
    Session cookies: yes
If Session cookies: none appears, you're most likely hitting a
CF-Access-protected URL without a service token — auth will fail on the
WebSocket upgrade. Switch CKBUNKER_URL to your private ingress.
Test 2 — message_signing
CKBunker can sign an arbitrary text message with a key derived from the Coldcard seed. The server never sees the key; it forwards the message to the Coldcard and returns the signature.
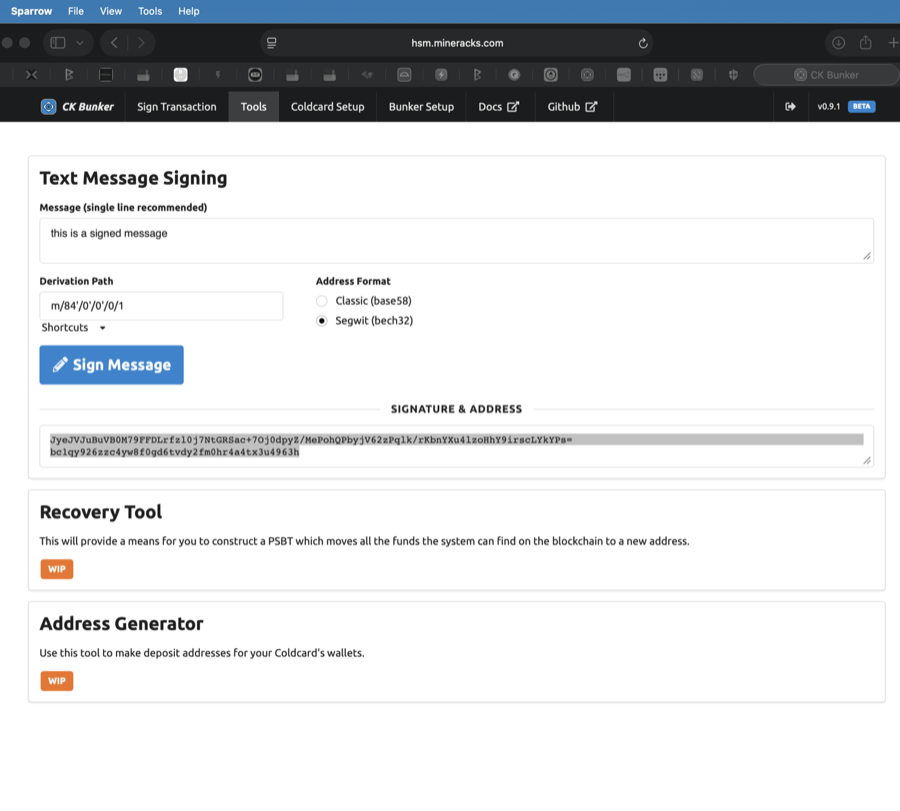
m/84'/0'/0'/1, segwit (bech32) address. The "Sign Message" button triggers the same WebSocket action the harness invokes programmatically.The harness verifies the returned signature by sending it back through a wallet (Sparrow in this example) to confirm it validates against the expected address:
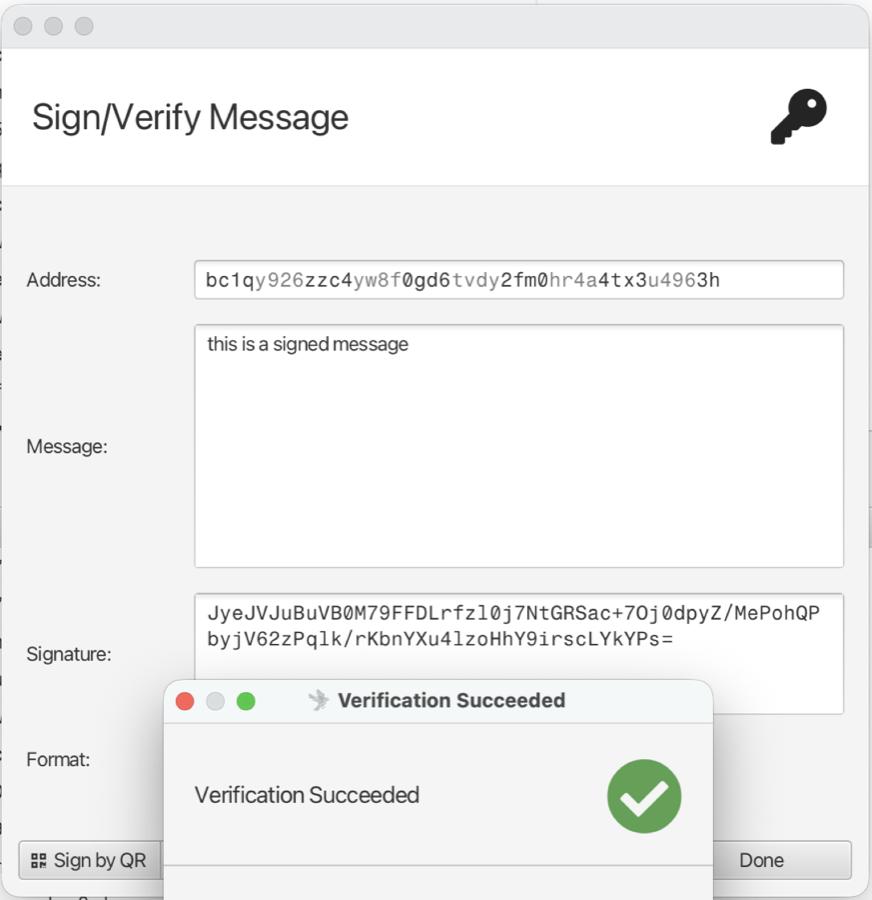
Why this test is cheap and valuable: it doesn't need a UTXO, doesn't affect spending counters, and catches about 80% of "the Coldcard is detached" or "wrong Coldcard" problems in one second.
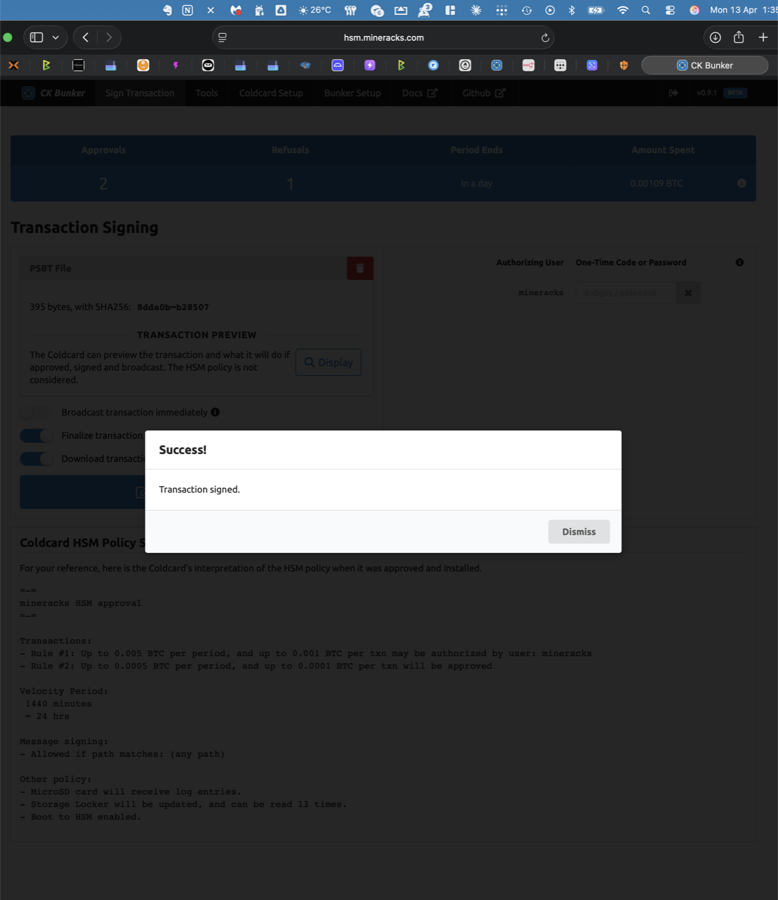
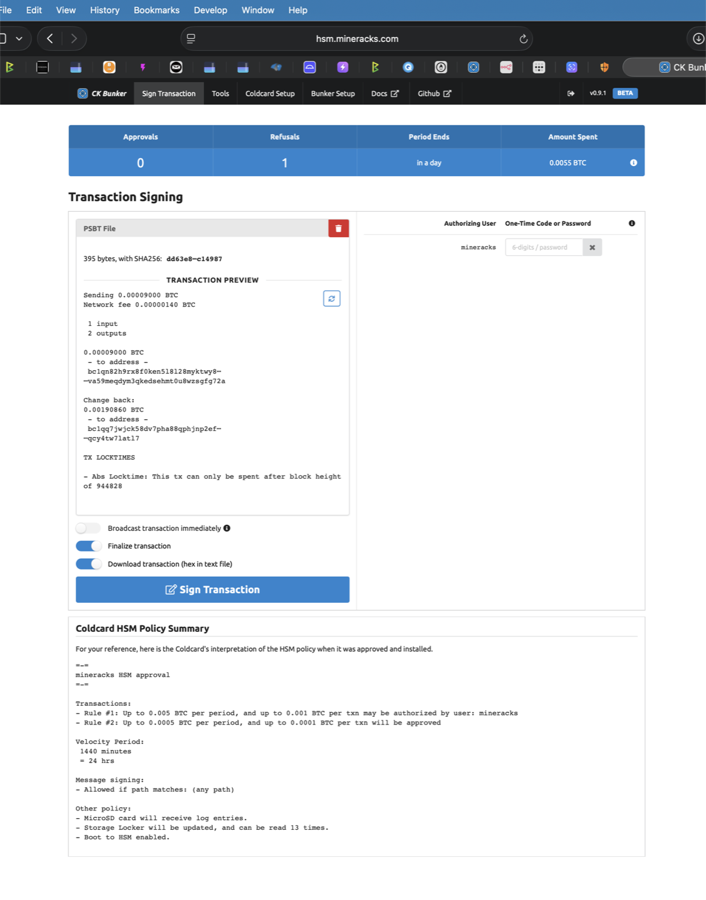
Test 3 — rule2_auto_approve
Sub-threshold PSBT (under your Rule #2 per-txn cap) signs with no TOTP.
Via the web UI
Via the harness
./hsm_validate.py --tests rule2_auto_approve
The harness uses the identical WebSocket protocol the browser uses:
To check the output is actually valid, load it in a wallet:
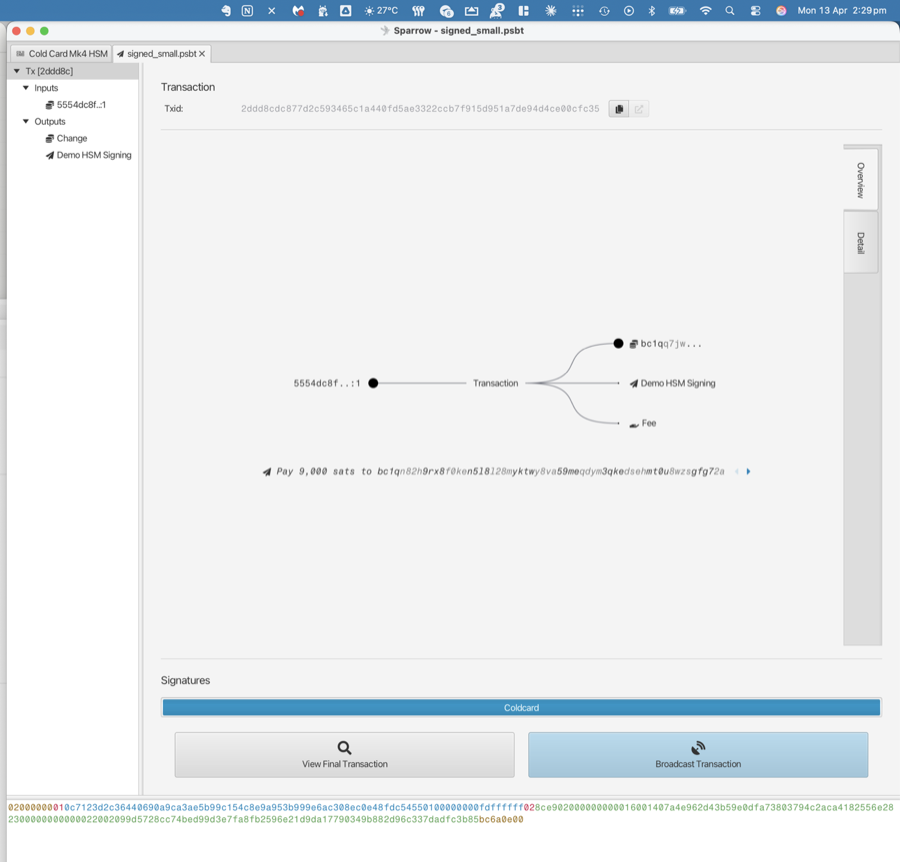
Don't broadcast these test PSBTs during a validation run. Re-use the same
small.psbt fixture across runs while the UTXO is still unspent in your
watch-only wallet.
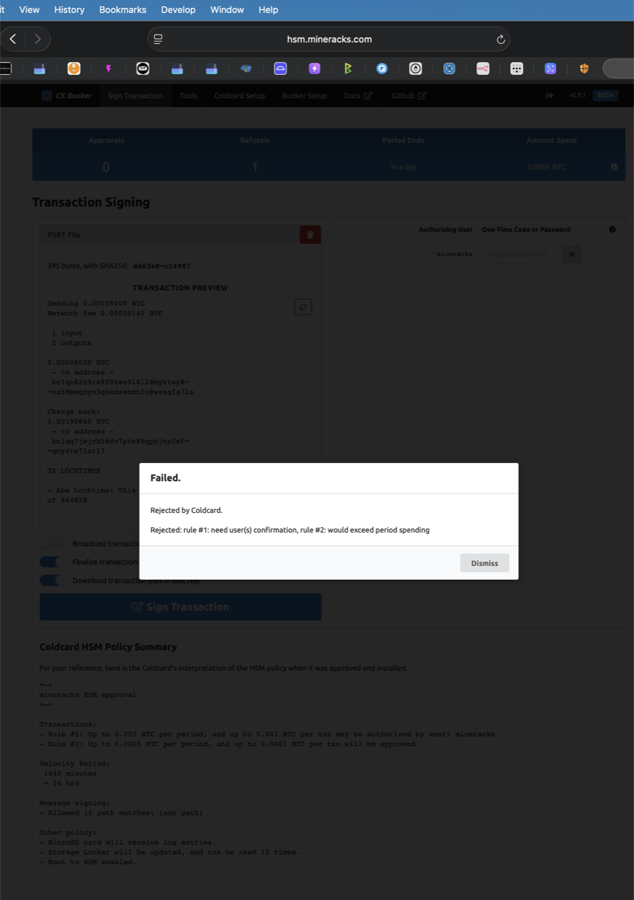
Test 4 — rule1_without_totp_rejects — the critical assertion
The single most important test in this harness. A PSBT over your Rule #2 cap is submitted without a TOTP code. The Coldcard must reject it.
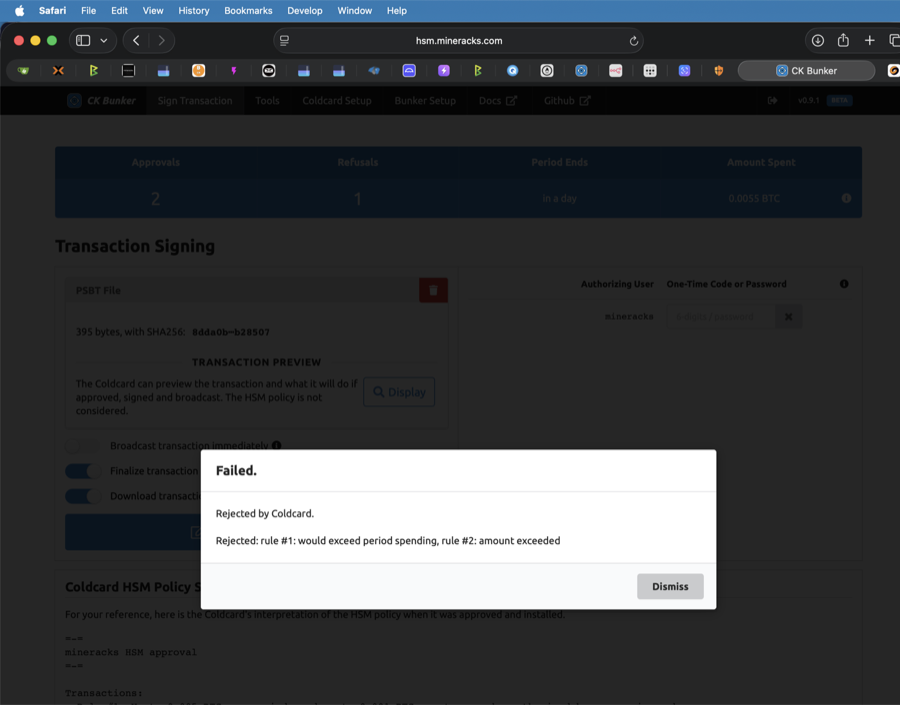

The harness asserts not just "some rejection happened" but that the reason contains "rule #1":
# tests/test_04_rule1_without_totp_rejects.py
assert res.is_expected_rejection("rule #1"), (
    f"expected a 'rule #1: need user(s) confirmation' rejection, "
    f"got status={res.status.value} reason={res.reason!r}"
)
What failure looks like
If this test reports PASS when it should fail — i.e. the Coldcard signed an above-threshold PSBT without TOTP — your policy is broken. The harness explicitly flags this case:
✗ rule1_without_totp_rejects    policy NOT enforced: large PSBT was signed
                                without TOTP — STOP AND INVESTIGATE
Action: exit HSM mode via the escape code and re-install the policy.
Test 5 — rule1_with_totp_signs
The same large PSBT. A fresh TOTP code. Should sign cleanly.
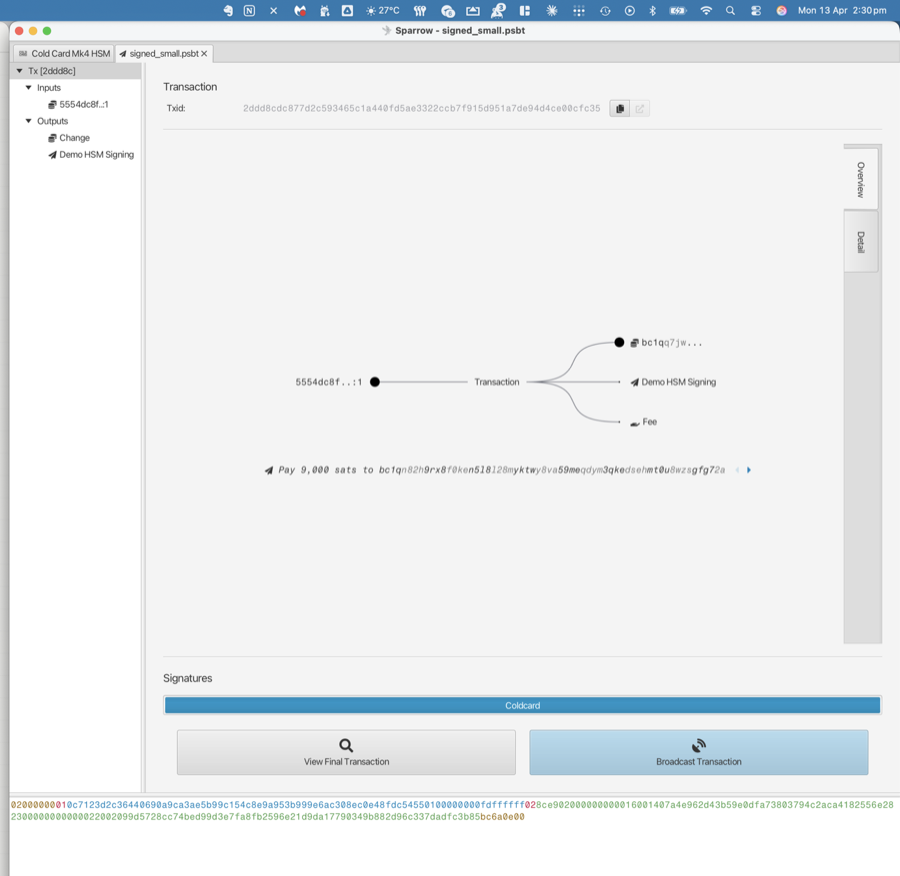
--totp flag auto-generates a 6-digit code from the stored TOTP_SECRET (shown here as 579322, valid for 6 seconds). The client submits the code as a user authorisation, then uploads the PSBT. The Coldcard verifies TOTP against its seeded secret, sees Rule #1 is satisfied, and signs.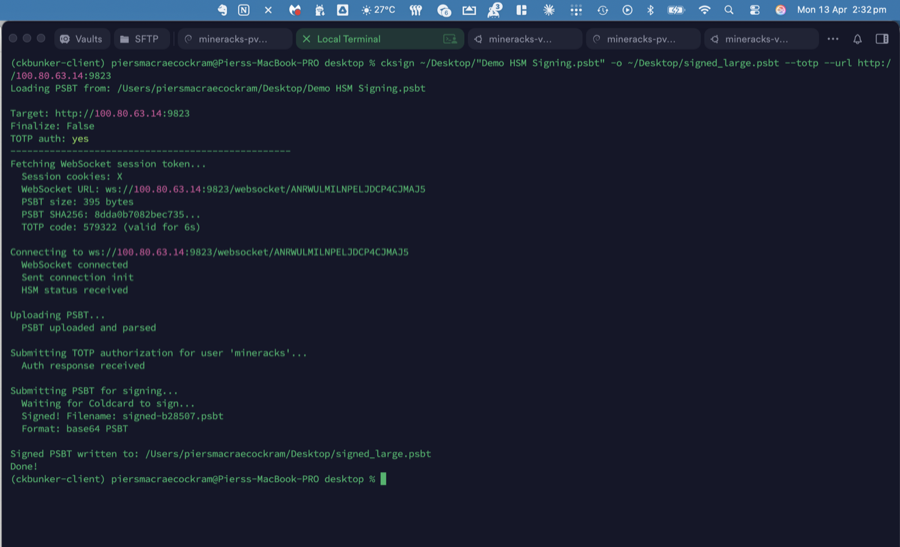
If this test fails with bad TOTP code reason:
- Your Mac / runner clock is out of sync. TOTP has a 30-second window;
check
ntpdate -q time.apple.comor equivalent. - Your
TOTP_SECRETenv var is stale (TOTP was rotated on the Coldcard but the secret on disk wasn't updated). - The user name in your config doesn't match the user named in the policy's Rule #1.
Test 6 — counters_tracked
A sanity check that the server-visible counters moved as expected. This catches the unlikely case where the harness thinks a sign happened but the CKBunker / Coldcard don't agree.
The harness snapshots the counters before and after running the signing tests, computes the deltas, and asserts they match the number of approvals/rejections it saw in its own results. If the numbers agree, everything from the WebSocket to the device-visible state is consistent.
If this test skips with "could not parse dashboard counters on this CKBunker version", the scraper regex didn't find the numbers in your CKBunker's HTML. The signing tests already proved correctness — file an issue with your CKBunker page source if you'd like regex support.
The end-to-end picture
All six tests tell you, in one short run, whether the whole trust model is intact:
| Layer validated | Tests that cover it |
|---|---|
| Network / Tailscale / Cloudflare reachability | 1 |
| CKBunker service running, WS protocol intact | 1, 2, 3, 4, 5 |
| Coldcard reachable, USB passthrough live | 2 |
| Coldcard policy loaded, Rule #2 path active | 3 |
| Coldcard policy Rule #1 gate enforced | 4 |
| TOTP secret in sync between device + holder | 5 |
| Server state tracks device decisions | 6 |
A green run is a strong signal that the HSM is doing its job. A red run on test 4 is the kind of finding you'd want to wake up for.
Running this yourself
Every capability shown here maps to one test in the test suite. To reproduce on your own deployment:
- Follow the setup in the top-level README.
- Adjust
config.yamlto match your policy's per-txn and per-period caps. - Craft two PSBTs per fixtures/README.md — one below your Rule #2 cap, one above it.
- Run
./hsm_validate.py.
A passing run should match the flow in this document. A failing run should tell you exactly which layer of the HSM contract is broken.